Setting up the WordPress plugin
Six steps from a new account to your first shared post, about ten minutes. Two happen on planbatch.com and four in your WordPress admin.
Connect a social account before you connect the site. The plugin posts through the accounts connected to your PlanBatch account, so until one is connected it has nowhere to share. That is step 2, and the one most people miss.
On planbatch.com
Step 1: Create a PlanBatch account
The plugin does its scheduling through your PlanBatch account. The free plan needs no payment details and is enough to use the plugin.
Create a free accountStep 2: Connect at least one social account
Open Connections and connect the accounts you want to post to: Facebook, Instagram, LinkedIn profiles, Pinterest, Bluesky or Threads. You can add more later, and the plugin picks them up the next time you open its settings.
In your WordPress admin
Step 3: Install and activate the plugin
Go to Plugins, Add New Plugin, search for PlanBatch, then install and activate it. A notice on the Plugins screen links straight to the next step. Installing sends us nothing: the plugin makes no request to PlanBatch until you connect it.
Step 4: Connect your site
Open PlanBatch in the admin menu and press Connect to PlanBatch. A PlanBatch tab opens (sign in if it asks). Pick the brand this site belongs to and press Approve connection. Back in WordPress, the page updates by itself.
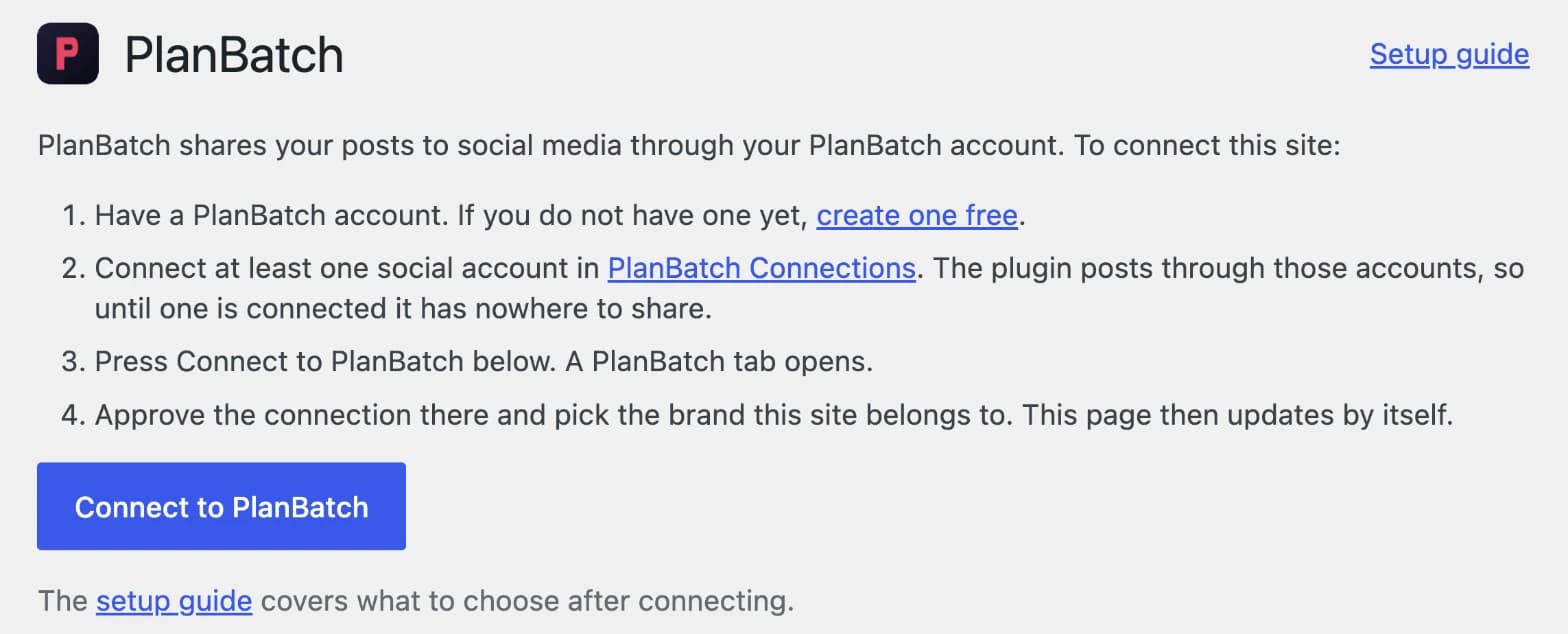
The PlanBatch page before the site is connected. Full size Running more than one site? Connect each one separately. Each gets its own key and can belong to a different brand.
Step 5: Choose what gets shared
On the Auto-share tab, four settings decide what happens when you publish:
- Platforms
- The networks new posts go to. A greyed-out network is not connected in PlanBatch yet.
- Post types
- Posts, pages, WooCommerce products, or your own types.
- Image mode
- Share the link and let the network build its preview, or generate a branded image from your PlanBatch templates. Instagram and Pinterest need the branded image.
- Caption pattern
- What the caption says, built from the post’s title, excerpt, link and tags.
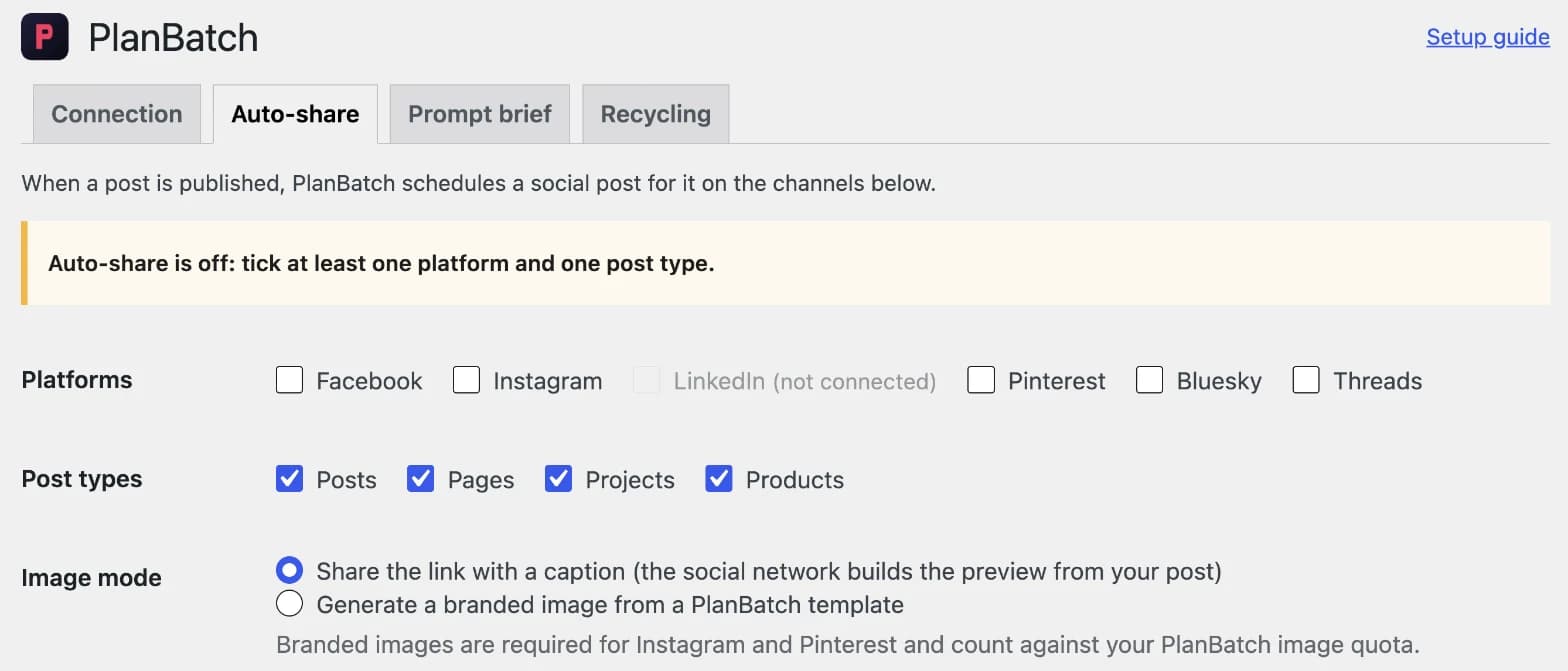
A network that is not connected in PlanBatch shows greyed out. Full size Press Save auto-share. The Connection tab then says “Auto-share is on” and names the post types and networks.
Step 6: Publish a post, or share the ones you already have
Publish a post of a type you ticked. The PlanBatch column on the posts list shows whether it was shared, and every shared post lands on your PlanBatch calendar, where you can change or delete it.
For posts and products published before you installed the plugin, open PlanBatch, Bulk Share, pick the items and spread them across the coming weeks. To have an AI assistant write the slides, follow the AI assistant guide.
Nothing was shared?
Find what you see below. It is almost always one of these.
Every network is greyed out on the Auto-share tab
No social account is connected in PlanBatch. Connect one (step 2), then reload the tab.
The Connection tab says “Auto-share is off”
No post type or no network is ticked. Tick at least one of each on the Auto-share tab and save.
Facebook got the post, but Instagram or Pinterest did not
Those two need a branded image, and Image mode is set to share the link. Switch to the branded image.
I edited a published post and nothing happened
That is by design: a post is shared once, when it is first published. To share older posts again, use recycling or Bulk Share.
To see exactly what the plugin sends and when, read what the WordPress plugin sends.